

How to Fix Loose Gym Equipment: A 2026 Repair Guide
Table of Contents
- Why Loose Gym Equipment Is a Safety Hazard You Can't Ignore
- Best Tools for Home Gym Repair: What You Actually Need
- Step 1: Identify Loose Bolts and Hardware on Fitness Machines
- Step 2: How to Tighten Cables on a Workout Machine
- Step 3: Lubricate Moving Parts and Guide Rods
- Step 4: Apply Threadlocker to Prevent Future Loosening
- Your Gym Equipment Maintenance Checklist for 2026
- When to DIY Repair vs. Call a Professional Technician
- Frequently Asked Questions
Last Updated: September 8, 2026
Why Loose Gym Equipment Is a Safety Hazard You Can't Ignore
A loose bolt on a squat rack or a slack cable on a pulley machine is a direct threat to your safety. When hardware fails under load, the result can be a dropped barbell, a snapped cable, or a collapsed frame, leading to serious injury. This guide from Combat Build Supply walks you through how to fix loose gym equipment so you can train with confidence.
Constant vibration from heavy lifts is the primary culprit behind loosening fasteners. Below, we'll show you how to perform a safety inspection, tighten what's loose, and prevent future issues.
Best Tools for Home Gym Repair: What You Actually Need
You don't need a professional technician's toolbox for most gym equipment repair tasks, but you do need the right size and type of tool. Using the wrong tool strips bolt heads and makes removal nearly impossible. For most home gyms, a basic set of metric and standard wrenches, a socket set, and allen keys will cover nearly every fastener.
Metric vs. Imperial: Which Do You Need?
Before you buy anything, check your equipment's manual or look for markings on the bolt heads. Most commercial-grade equipment from brands like Rogue, Rep Fitness, and Titan Fitness uses imperial (SAE) fasteners, typically 1/2-inch, 9/16-inch, and 3/4-inch socket sizes. However, many budget-friendly home machines and imported functional trainers use metric fasteners, commonly 10mm, 13mm, and 17mm. Some brands mix both.
| Fastener Type | Common Sizes (Imperial) | Common Sizes (Metric) | Typical Use |
|---|---|---|---|
| Allen/Hex Bolts | 3/16", 1/4", 5/16" | 4mm, 5mm, 6mm, 8mm | J-hooks, pull-up bars, weight horns |
| Socket Head Bolts | 1/2", 9/16" | 13mm, 14mm | Frame connections, uprights |
| Lag Bolts | 3/8", 1/2" | 10mm, 12mm | Anchoring to walls or platforms |
The practical move: Buy a dual set of both metric and SAE allen keys (a standard ball-end set costs $15-$25) and a socket set that includes both 1/4-inch and 3/8-inch drives.

The Complete Tool List
- Wrench and Socket Set: For tightening bolts and nuts on frame connections and adjustment points. A ratcheting combination wrench set (both metric and SAE) is ideal.
- Allen Keys (Hex Keys): Most commercial and home gym brands use hex-head bolts for securing J-hooks, pull-up bars, and weight horns. A T-handle allen key set provides better leverage than the standard L-shaped keys.
- Torque Wrench: While not mandatory for every bolt, a torque wrench helps you apply the correct tension to critical structural fasteners, preventing both under-tightening and over-tightening. Most power rack frame bolts should be torqued to 40-50 ft-lbs; anything less risks loosening, anything more risks stripping the threads.
- Threadlocker: A medium-strength (blue) threadlocker is the single best preventative measure against bolts vibrating loose over time. See Step 4 for a full application guide.
- Lubricant: A dry silicone spray or lithium grease is essential for maintaining guide rods and pulleys without attracting dust and grime.
- Rubber Mallet: Useful for gently tapping stuck pins or alignment dowels without damaging the frame.
- Magnet Tray: Keeps small screws, washers, and bolts from rolling away mid-repair.
Where to Buy Replacement Fasteners
When you need a specific bolt or nut, don't assume you must order from the equipment manufacturer. Most gym equipment uses standard hardware store fasteners. Take the old bolt to a local hardware store (Home Depot, Lowe's, or Ace Hardware) and match it by thread pitch and length. For high-stress connections, ask for Grade 8 bolts, which handle higher tensile loads than standard Grade 2 or Grade 5 bolts. If you need a specialty item like a shoulder bolt or a nylon-insert lock nut, fastenal.com or McMaster-Carr stocks virtually every size imaginable and ships within 24 hours.
Step 1: Identify Loose Bolts and Hardware on Fitness Machines
Start your inspection by visually examining the entire frame, from the base plates to the top crossmembers. Loose gym equipment often announces itself through wobbling or a metallic clatter, but don't wait for those signs. Methodically check every connection point where two pieces of metal meet for gaps or movement.
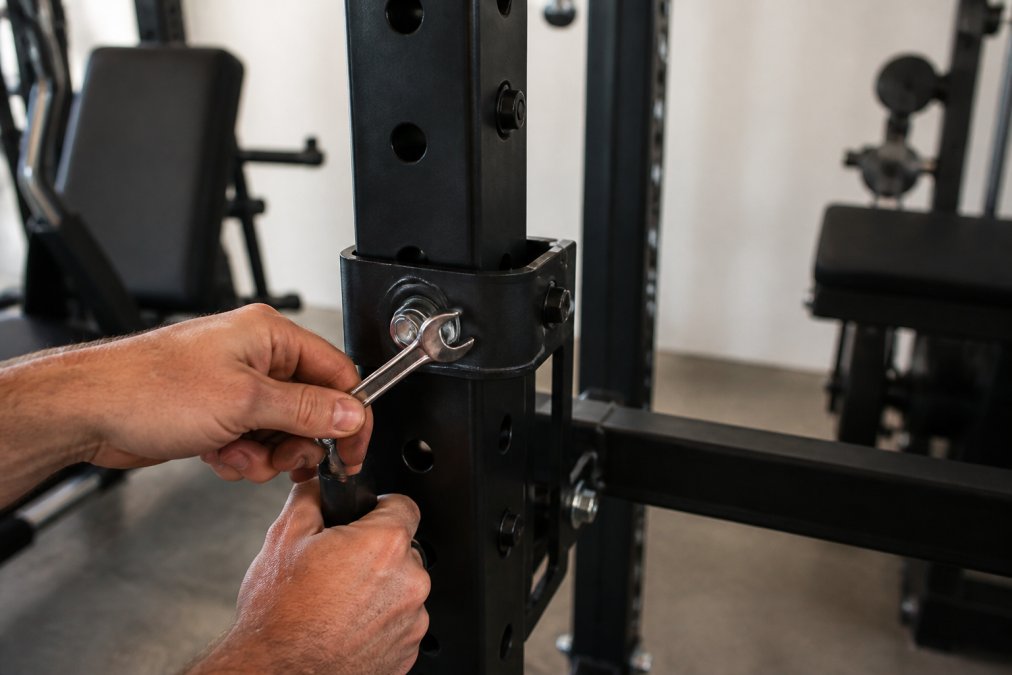
The most common failure points are the bolts securing uprights to the base, the fasteners holding pull-up bars, and the hardware on moving joints for adjustable benches. Use your wrench or allen key to test the tension on each bolt; if you feel any give before resistance, it needs tightening. Don't forget smaller hardware like pulley wheel screws and cable end nuts.
Step 2: How to Tighten Cables on a Workout Machine
Cable machines require a different approach than simple bolt tightening, as cable tension dictates smoothness and safety. If your cable feels slack at the start of a rep or the weight stack doesn't lift until halfway through the pull, the cable needs adjustment. Most home gym systems have an adjustment point at the top of the guide rod or at the weight stack pin connection.
Identify Your Cable System Type
Before adjusting anything, determine which cable configuration your machine uses:
- Single-pulley system: One cable runs from the weight stack to a single handle. The adjustment point is typically at the top of the guide rod where the cable anchors.
- Dual-pulley (functional trainer) system: Two independent cables run through multiple pulleys to each side. Each cable has its own adjustment point, usually at the top or bottom of the guide rod.
- Lat pulldown/low row combo: A single cable routes through a series of pulleys to two different attachment points. The tension adjustment is usually at the weight stack end.
The Adjustment Mechanism
Most home gym cable systems use one of two adjustment mechanisms:
- Threaded bolt with locking nut: Located at the cable's anchor point. Loosen the locking nut with a wrench, then turn the adjustment bolt to take up slack. Tighten the locking nut afterward.
- Turnbuckle: A barrel-shaped connector with threads on both ends. Rotate the center section to shorten or lengthen the cable path.
How Much Tension Is Correct?
A common mistake is over-tightening, which causes premature wear on pulleys and bearings. Correct tension allows the weight stack to rest fully on the bottom plate with no visible sag. When you pull the handle, the stack should begin moving within 1-2 inches of travel. If it takes more than 3 inches, the cable is too loose; if the stack lifts off the plates at rest, it's too tight.
Step-by-Step Adjustment
- Remove all weight plates from the stack so you're working with minimal resistance.
- Locate the adjustment point at the top or bottom of the guide rod.
- Loosen the locking nut (if present) with the appropriate wrench.
- Turn the adjustment bolt clockwise to take up slack, or counterclockwise to release tension. Make small adjustments, a quarter turn at a time.
- Re-tighten the locking nut while holding the adjustment bolt steady.
- Test the movement by pulling the handle through a full range of motion. The pulley should rotate smoothly without binding or clicking.
Troubleshooting Decision Tree
| Symptom | Likely Cause | Action |
|---|---|---|
| Cable slack at start of rep | Cable stretched or anchor bolt loose | Tighten adjustment bolt 1/4 turn |
| Weight stack lifts unevenly | Cable misaligned on pulley | Check routing; reseat cable in pulley groove |
| Grinding or clicking sound | Pulley bearing worn or cable frayed | Inspect pulley; replace if damaged |
| Cable slips off pulley | Pulley misaligned or cable too loose | Realign pulley bracket; adjust tension |
| Resistance feels heavier than weight | Cable rubbing against frame or guide rod | Check cable path; adjust pulley alignment |
When to Replace Rather Than Adjust
If your cable has more than 1/2 inch of slack after a full turn of the adjustment bolt, the cable has likely stretched beyond its service life. Cables stretch permanently over time, and repeated tightening only masks the problem. Replace the cable if:
- You see any broken wire strands ("fuzz" on the cable surface)
- The cable has a visible kink or bend that doesn't straighten out
- The swage fitting (the metal crimp at the cable end) shows cracks or corrosion
- The cable is more than 5 years old, even if it looks fine
Replacement cables for most home gyms cost $20-$60 depending on length and pulley configuration. Order from the original manufacturer when possible, or match the cable diameter and length at a rigging supply store. When installing a new cable, apply a light coat of dry silicone lubricant to the cable before routing it through the pulleys, this reduces friction and extends cable life.
Step 3: Lubricate Moving Parts and Guide Rods
Squeaking and sticking are the first signs that moving parts need lubrication. Guide rods on a weight stack machine and linear bearings on a functional trainer require a clean, dry lubricant to operate smoothly. Use a dry silicone spray or lithium grease designed for fitness equipment. Apply a light coat to a clean cloth, wipe down the full length of the guide rods, and run the weight stack up and down a few times to distribute it evenly. Avoid WD-40 or oil-based lubricants, as these attract dust and grime that will gum up the parts.
Step 4: Apply Threadlocker to Prevent Future Loosening
Tightening a bolt is only a temporary fix; vibration from heavy training will eventually loosen it again. To solve this permanently, apply a medium-strength (blue) threadlocker to the bolt threads before re-tightening. It prevents loosening from vibration while still allowing removal with hand tools.
To apply it correctly, remove the bolt, clean the threads with a rag, and apply a single drop of threadlocker to the middle of the threads. Reinsert the bolt and tighten to the manufacturer's recommended torque. The threadlocker cures in about 24 hours, but the equipment can typically be used after a few hours. This is the most overlooked preventative measure in gym equipment maintenance.
| Problem | Solution | Preventative Measure |
|---|---|---|
| Loose frame bolts | Tighten with wrench/socket set | Apply blue threadlocker to threads |
| Slack cable on pulley | Adjust bolt at cable end | Check tension monthly |
| Squeaking guide rods | Lubricate with dry silicone spray | Wipe down rods weekly |
| Wobbly J-hooks | Tighten set screw or side-lock pin | Inspect before every session |
Your Gym Equipment Maintenance Checklist for 2026
Establishing a routine is key to extending the lifespan of your investment. A proactive maintenance checklist prevents minor issues from becoming major safety hazards. We recommend a three-tiered schedule: before every workout, a monthly deeper inspection, and an annual full-service check.
- Before Each Workout: Visually check J-hooks and safety arms for secure placement, feel for loose bolts on the frame, and listen for unusual squeaking or grinding noises.
- Monthly: Perform a full hardware check on all bolts and nuts, lubricate guide rods and pulleys, inspect all cables for fraying, and verify the structural integrity of welds and frame connections.
- Quarterly: Check the tension on all cables, re-apply threadlocker to any bolts that have come loose, and clean the entire frame to remove chalk dust and sweat that can corrode metal over time.
When to DIY Repair vs. Call a Professional Technician
While most loose gym equipment issues are straightforward DIY repairs, some situations require professional expertise. If you encounter a cracked weld, a bent frame, or a severely frayed cable, do not attempt a temporary fix, these compromise structural integrity and a patch job could fail under load. Contact the manufacturer or hire a professional technician.
For hardware replacements, sourcing the correct parts is critical. Using mismatched bolts or low-grade fasteners can be just as dangerous as a loose bolt. When you need replacement parts for your rack or cable machine, look for certified components from the original manufacturer. At Combat Build Supply, we understand the importance of durable, reliable gear, which is why we recommend the Major Fitness Heritage Series J-Hooks for secure barbell support, featuring scratch-resistant liners and a side-lock pin to keep your bar locked in place under heavy loads. For those looking to upgrade their cable system, the Major Fitness Aluminum Pulley & Weight Stack Bundle replaces stock nylon pulleys with precision-machined aluminum for smoother, quieter cable travel.
Keeping your gym equipment in top condition is a direct investment in your training safety and performance. A loose bolt or a worn cable can turn a productive session into a trip to the emergency room, so make maintenance a non-negotiable part of your routine. Whether you need to replace worn J-hooks, upgrade your pulley system, or simply add a quality barbell to your setup, Combat Build Supply offers durable gear backed by a 100% refund policy for defective items and premium customer support via live chat, email, or phone. Get started with Combat Build Supply and ensure every session goes smoothly with equipment you can trust.
Frequently Asked Questions
What is the best tool to tighten loose bolts on gym equipment?
A socket wrench set with metric and standard sizes is the most efficient tool for tightening loose bolts on gym equipment. Most home gym frames use hex head bolts, so a socket wrench provides better leverage and grip than an adjustable wrench. You will also need a set of Allen keys for recessed fasteners. Always match the tool size to the bolt head to avoid stripping the metal.
How often should you perform maintenance on gym equipment?
You should perform a basic safety inspection and tighten loose gym equipment every 30 days if you train more than three times per week. A deeper maintenance routine, including lubrication and cable inspection, should happen every three months. Gyms with heavy daily use should shift to a weekly check of all bolts and fasteners.
How do I know if a cable needs replacing instead of just tightening?
Inspect the cable for frayed wires, kinks, or a rusty appearance. If the cable has more than two broken wire strands in one section, replace it immediately. Tightening is only effective when the cable is intact but has stretched. If you notice a loss of resistance or a grinding noise during pulley movement, the cable or pulley system likely needs professional attention.


