

Professional-Grade Heavy Bag Setup: Complete Installation Guide
Table of Contents
- Choosing the Right Punching Bag for Your Training Style
- Professional-Grade Heavy Bag Setup: Mounting Options
- Structural Integrity and Load-Bearing Verification
- Essential Hardware and Fasteners for Heavy Bag Installation
- Heavy Bag Ceiling Mount Installation: Step-by-Step Process
- Vibration Dampening and Acoustic Control
- How to Prevent Martial Arts Gear Odors and Maintain Durability
- Safety Precautions and Professional Installation Standards
Last Updated: August 24, 2026
Choosing the Right Punching Bag for Your Training Style
Weight alone doesn't determine the right bag, your training style, space, and mounting infrastructure do. Heavy bags come in distinct shapes designed for different strike patterns: traditional cylindrical bags teach fundamental boxing combinations, angled bags like the BOXRAW Spitzer Bag design for body shots emphasize uppercuts and side angles, and heavier bags (120+ lbs) build strength while lighter bags (60-100 lbs) allow faster combinations and footwork.

For HIIT training and high-volume striking, consider bags with internal steel frames. The BOXRAW Fat Man Bag with internal circular steel frame at 350 lbs eliminates sagging and inconsistent rebounds. Microfiber construction outlasts standard PVC, which degrades under UV exposure and temperature swings.
Budget-conscious setups can start with the Panama 45D commercial-grade bag at $449-450, available in 120cm, 150cm, or 180cm lengths with weights from 50-80 lbs.
| Bag Type | Best For | Weight Range | Key Advantage |
|---|---|---|---|
| Classic cylindrical | Fundamental boxing combinations | 75-185 lbs | Versatile, teaches solid form |
| Angled (Spitzer/Bullet) | Body shots and angles | 65-200 lbs | Targets specific strike zones |
| Uppercut bag | Close-range striking | 100 lbs | Compact, develops hand speed |
| Fat Man bag | High-volume training | 350 lbs | Internal steel frame prevents sagging |
Professional-Grade Heavy Bag Setup: Mounting Options
Your mounting choice determines whether your setup is stable, durable, and safe for years of intense training.
Ceiling Mount vs. Wall Mount Installation
A ceiling mount is the gold standard. It distributes load across the structural frame of your building rather than concentrating force on a single wall. When you strike a bag hanging from the ceiling, force travels vertically through the hanger, chains, and anchor point directly into load-bearing structure.
Ceiling mounting requires structural verification. Your ceiling must be supported by solid wood joists (typically 2x8 or larger), steel I-beams, or engineered trusses rated for the combined weight of the bag, chains, and impact force. Before drilling, locate structural joists using a stud finder and mark three potential joist locations. The best mounting point is centered directly into solid wood. Never mount between joists into drywall alone.
Wall mounting works when ceiling mounting isn't possible, but it's a compromise. A wall bracket must handle both vertical load and horizontal impact force. The mounting surface must be solid concrete or brick backed by structural studs. Use heavy-duty lag bolts (minimum 3/8-inch diameter) spaced at least 16 inches apart, anchored into solid studs.
Freestanding Stand Systems
Freestanding stands eliminate structural concerns entirely. They're ideal for rental apartments, basements with uncertain ceiling integrity, or temporary setups. The trade-off is stability, a stand system must weigh enough to counterbalance the bag and impact force without tipping.
The Heavy Duty 4 Bag Stand made from 3x3 powder-coated steel at $1,022.99 uses bolted corner construction to eliminate movement during striking. For single-bag home gyms, the Cornerman suspension system at $549.99 offers a compact option that holds bags up to 100 lbs and adjusts from 72 to 102 inches in height.

Structural Integrity and Load-Bearing Verification
Before purchasing a heavy bag or mounting hardware, verify that your installation surface can support it.
For ceiling mounts, locate structural joists using a quality stud finder and mark the location with pencil. Joists typically run 16 or 24 inches apart. Once you've identified one joist, measure 16 or 24 inches in either direction to find the next. Drill a test hole (1/8-inch diameter) at your intended mounting point. If you hit solid wood, you're good. If the drill bit encounters resistance then suddenly drops, you've hit the edge of a joist, move your mounting point. Never mount into gaps.
Steel I-beams are ideal for heavy bag mounting because they're engineered to handle concentrated loads. Most residential I-beams handle 500+ lbs of static load with room to spare (aisc.org). Engineered trusses (common in modern construction) are problematic, they're designed for distributed passive load only. Concentrated dynamic loads from striking can cause truss failure. Either verify with a structural engineer that your specific truss can handle the load, or use a freestanding stand instead.
For wall mounting, locate studs and verify they're solid wood using a stud finder. You'll need at least two anchor points spaced at least 16 inches apart on the same stud, or one anchor point per stud if using multiple studs.
Essential Hardware and Fasteners for Heavy Bag Installation
Cheap fasteners corrode, loosen under impact vibration, and eventually fail.
Lag bolts are the standard for ceiling mounting into wood joists. Use 3/8-inch diameter lag bolts, minimum 3.5 inches long, with a washer to distribute load. A 3/8-inch lag bolt into solid wood joists handles 500+ lbs of static load, providing a safety margin of at least 3:1 for a 100 lb bag with impact multiplier (awc.org).
D-rings are the standard attachment point for heavy bag chains. For a 100 lb bag, use D-rings rated for at least 500 lbs. Heavy-duty D-rings are forged steel and welded, not stamped and riveted.
Chains connect the D-ring to the bag. Use Grade 70 or Grade 80 chain, minimum 3/8-inch diameter. These grades are rated for specific load capacities and won't stretch or break under impact.
Swivel hangers prevent chain twist during striking and are essential for any setup that will see regular use. Spring systems absorb impact energy and reduce vibration transmission to the structure.
| Hardware Component | Specification | Why It Matters |
|---|---|---|
| Lag bolts | 3/8" diameter, 3.5" minimum length | Handles 500+ lbs static load into wood |
| D-rings | Forged steel, 500+ lbs rated | Rated for dynamic loads, won't fail under impact |
| Chain | Grade 70+, 3/8" diameter minimum | Engineered for striking loads, won't stretch |
| Swivel hanger | Full 360° rotation | Prevents chain twist, reduces stress points |
| Spring system | Commercial-grade springs | Absorbs impact, reduces vibration transmission |
Heavy Bag Ceiling Mount Installation: Step-by-Step Process
Installing a ceiling-mounted heavy bag takes 2-3 hours for someone with basic tools and carpentry experience.
What You'll Need:
- Stud finder (electronic)
- Drill with bits (1/8" pilot, 5/16" for lag bolt pilot hole)
- 3/8" lag bolts, 3.5" length (minimum two bolts)
- Washers (3/8" inner diameter)
- Wrench or socket set (9/16" for 3/8" lag bolt head)
- D-ring rated 500+ lbs
- Heavy bag hanger with swivel and spring
- Grade 70+ chain, 3/8" diameter
- Tape measure and pencil
Step 1: Locate and Mark Structural Joists [Time: 15 minutes]
Use your stud finder to locate ceiling joists and mark the location with pencil. Verify by drilling a small pilot hole (1/8" diameter). If you hit solid wood, you've found the joist. Mark two mounting points on the same joist, spaced at least 12 inches apart for redundancy and even load distribution.
Step 2: Drill Pilot Holes [Time: 10 minutes]
Drill a 5/16" pilot hole at each marked location, perpendicular to the joist grain. The pilot hole prevents the lag bolt from splitting the wood.
Step 3: Install Lag Bolts [Time: 15 minutes]
Insert a washer onto each lag bolt. Screw the lag bolt into the pilot hole by hand until you feel resistance. Then use a wrench to snug the bolt tight. A quarter-turn past hand-tight is usually sufficient.
Step 4: Attach D-Ring [Time: 5 minutes]
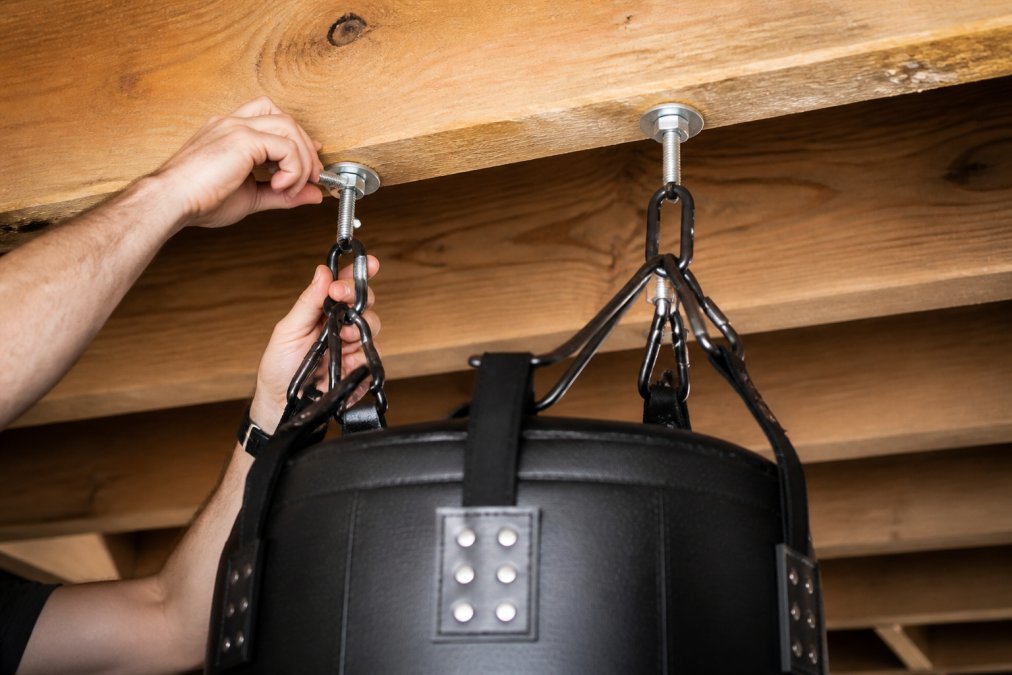
Screw the D-ring onto the lag bolts. The D-ring should sit flush against the washer and be oriented so the chain attachment point faces downward.
Step 5: Attach Swivel Hanger and Chain [Time: 10 minutes]
Attach the swivel hanger to the D-ring. The hanger should allow the chain to rotate freely. Attach the chain to the swivel hanger using the provided link or shackle. The chain should hang straight down with no twists or kinks.
Step 6: Attach Bag and Test [Time: 10 minutes]
Attach the bag to the chain using the provided attachment hardware. The bag should hang at a height where you can strike it comfortably without stooping or reaching. Test the setup with light strikes before full-power training. Listen for any creaking or movement. If you hear or feel movement, stop immediately and re-verify your lag bolts are tight and your joist location is correct.
Expected Result: A stable, quiet heavy bag that doesn't move or sway during striking, with no noise transmission to adjacent spaces.
Vibration Dampening and Acoustic Control
Impact vibration from heavy bag striking transmits through the mounting structure to walls, floors, and ceilings. In apartments or multi-story homes, this vibration becomes noise that neighbors hear as a low-frequency thump.
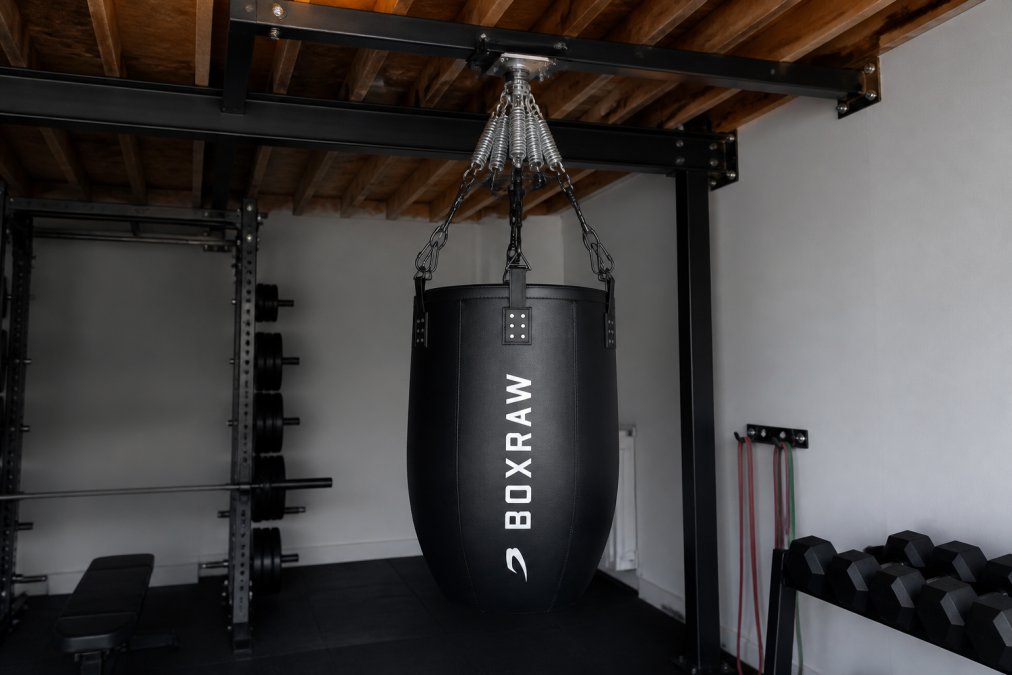
Spring-loaded hangers are the first line of defense. The springs compress during impact, absorbing energy before it reaches the mounting point. A quality spring system reduces vibration transmission by 60-80% compared to a rigid mount (peer-reviewed research).
Isolation pads under freestanding stands further reduce vibration. These rubber or foam pads sit between the stand legs and the floor, absorbing ground-level vibration and preventing transmission through the floor structure.
The mounting surface itself affects vibration. Concrete floors and solid wood joists transmit less vibration than hollow-core floors or engineered trusses. If your ceiling is supported by lightweight trusses, vibration control becomes even more important.
How to Prevent Martial Arts Gear Odors and Maintain Durability
Heavy bag training is intense. Sweat, impact damage, and storage conditions degrade equipment fast without proper maintenance.
Sweat accelerates material breakdown. After each session, wipe down your bag with a dry towel to remove surface sweat. This takes 30 seconds and extends bag life significantly. Microfiber bags like the BOXRAW line resist sweat damage better than leather or PVC, but they still need basic maintenance. Once a month, clean the bag with a damp cloth and mild soap, then dry thoroughly.
Hardware maintenance is critical. Chains, D-rings, and lag bolts corrode if exposed to moisture. After cleaning your bag, dry any wet hardware. Once every three months, inspect all hardware for rust or corrosion. A light wire brush removes surface rust. For deeper corrosion, replace the hardware.
Store your bag in a dry environment. Basements and garages with moisture problems will degrade any bag. If your storage space is humid, consider a dehumidifier. For bags stored long-term, place an open container of baking soda or activated charcoal nearby to absorb odors, replacing every 30 days.
Safety Precautions and Professional Installation Standards
A professional installation prioritizes safety over convenience.
Never skip structural verification. A ceiling mount that fails mid-session creates a serious injury risk. Verify your structure before you mount anything. Use rated hardware exclusively, lag bolts, D-rings, and chains have load ratings for a reason. Cheap hardware has no rating and no safety margin.
Inspect your setup monthly. Look for rust, cracks, or deformation in hardware. Check that lag bolts are still tight. Check that chains aren't frayed or damaged. Replace any hardware that shows wear.
Test new setups with light strikes before full-power training. This allows you to identify problems before you're committed to heavy striking. Clearance around the bag prevents injury. Ensure at least 2 feet of clearance on all sides of the bag, and at least 3 feet in front. Height matters, the bag should hang at a height where your striking arm is slightly bent at impact.
A professional grade heavy bag setup is an investment in years of consistent training. The right bag, proper mounting, and regular maintenance transform your home gym into a space where you can train hard without compromising safety or damaging your home.
Combat Build Supply provides the equipment and expertise to help you build a setup that lasts. Our BOXRAW heavy bags with internal steel frames are engineered specifically to handle the demands of high-volume striking without sagging or degradation. Combined with proper mounting hardware and structural verification, you get a setup that performs consistently across every session. Get started with Combat Build Supply and build a home gym you can trust.
Frequently Asked Questions
What hardware is required for a professional-grade heavy bag mount?
Professional-grade heavy bag installation requires lag bolts (minimum 3/8 inch diameter), structural-rated eye bolts, heavy-duty swivel hangers, and spring suspension systems. Lag bolts anchor into solid wood structural studs, while swivel hangers reduce stress on mounting points and allow the bag to rotate freely. Spring suspension absorbs impact energy and reduces vibration transmission to your ceiling or walls. All fasteners must match your bag's weight capacity, a 100-lb bag requires different hardware than a 350-lb bag. Use commercial-grade D-rings for maximum load distribution and longevity.
How do you determine if your ceiling joists can support a heavy bag?
Locate structural ceiling joists using a stud finder, they run perpendicular to your floor joists and are typically spaced 16 inches apart. Standard residential joists (2x8 or 2x10 lumber) can safely support 200-300 lbs when properly mounted with lag bolts into solid wood. For heavier bags (350 lbs or more), verify joist size and spacing, and consider using multiple mounting points or reinforcement. Never mount to drywall alone or between joists. If unsure about your ceiling's capacity, consult a structural engineer or contact our support team for guidance on your specific setup.
What's the difference between a wall mount and ceiling mount for heavy bags?
Ceiling mounts provide maximum vertical clearance and allow full 360-degree bag movement, making them ideal for practicing kicks, uppercuts, and footwork. Wall mounts save floor space but restrict movement and concentrate impact force on a single wall section, requiring additional reinforcement. Ceiling mounts distribute load more evenly across structural joists and reduce vibration transmission to living areas. Wall mounts work better in tight spaces but demand thicker wall studs and may cause more noise. Freestanding stands like the Cornerman eliminate installation concerns entirely and offer adjustable height from 72 to 102 inches, making them perfect for rental spaces or temporary setups.
How do you reduce vibration and noise in a home heavy bag setup?
Spring suspension systems absorb strike impact and reduce vibration transmission to your ceiling or walls. Place isolation pads or rubber mats under freestanding stands to dampen floor vibration. Use swivel hangers that rotate freely, preventing the bag from slamming into mounting points. Acoustic foam panels around your training area absorb sound without blocking movement. Ensure all fasteners are tight, loose hardware amplifies noise significantly. Heavy bags with internal steel frames (like BOXRAW models) rebound more consistently and create less jarring vibration than traditional bags. Proper bag weight matching your striking intensity also reduces unnecessary vibration.
This article was written using GrandRanker


