

Benefits of Using Heavy Bags for Conditioning
Table of Contents
- Why Heavy Bag Conditioning Beats Standard Cardio
- Cardiovascular Endurance and Anaerobic Threshold Gains
- Muscle Growth, Bone Density, and Joint Conditioning
- Stress Relief, Mental Focus, and Hand-Eye Coordination
- How Long Should a Heavy Bag Workout Last?
- Heavy Bag Workout Routine for Beginners
- Choosing the Right Heavy Bag for Your Conditioning Goals
- Common Mistakes and Recovery Protocols
- Frequently Asked Questions
Last Updated: September 16, 2026
Why Heavy Bag Conditioning Beats Standard Cardio
The benefits of using heavy bags for conditioning start with this: a heavy bag workout is resistance training and cardio in the same session. Every punch recruits your legs, hips, core, shoulders, and arms while your heart rate climbs into a working range you can hold for rounds. Treadmills and bikes train one system. The bag trains several at once.

Standard cardio asks your body to repeat a single motion against almost no resistance. Bag work asks for coordinated, forceful movement against real mass. Your muscles fight the bag's weight on every strike, and your cardiovascular system has to keep supplying oxygen to all of them.
A common mistake is treating the bag as a punching target and nothing else. It is a conditioning tool first.
Cardiovascular Endurance and Anaerobic Threshold Gains
Bag work improves cardiovascular endurance because interval rounds push your heart rate up, then a rest period lets it settle, then you go again. That repeated cycle is how you raise your anaerobic threshold, the point where your body starts relying on oxygen-independent energy systems.
Round-based training maps onto this naturally. A three-minute round followed by a one-minute rest creates a work-to-recovery ratio your heart adapts to over weeks, not days. As you get fitter, you recover faster between rounds, which shows up in everything from stair climbs to sparring.
Many practitioners find their resting heart rate drops after a few months of consistent bag work. That is a sign your heart is moving blood more efficiently per beat.
Muscle Growth, Bone Density, and Joint Conditioning
Heavy bag training builds muscle through repeated forceful contractions rather than heavy loading, so the result is usually muscular endurance and tone rather than bodybuilder-style hypertrophy. You will notice it most in the shoulders, upper back, core, and legs.
The Physics of Impact: Why the Bag Builds What It Builds
When your fist lands, the bag absorbs the force and your body absorbs the reaction. That reaction travels back through your knuckles, wrist, forearm, elbow, and shoulder in a fraction of a second. The bag's mass resists your strike, so your muscles fire against real resistance on every punch, but the load is submaximal and repeated, which is why you build endurance and tone rather than size.
This is also why technique matters more than power.
Bone Density and Joint Conditioning
Bone density responds to impact (Effects of Resistance Exercise on Bone Health). Striking a bag sends force through your hands, wrists, and forearms, and weight-bearing movement through your legs and hips. Over time, that loading encourages the body to maintain bone strength, which matters more as you age.
Joint-Specific Warm-Up Protocol
Most guides tell you to warm up. Few tell you what that means for a bag session. Run this five-minute sequence before you throw anything:
- Wrists (60 sec): Slow circles both directions, then gentle flexion and extension. Ten reps each.
- Shoulders (90 sec): Arm circles forward and back, then band pull-aparts if you have a band. Fifteen reps each.
- Elbows (60 sec): Slow flexion and extension with light resistance, then forearm pronation and supination. Ten reps each.
- Hips (90 sec): Leg swings front-to-back and side-to-side, then bodyweight squats. Ten reps each.
Joint-Specific Recovery Protocol
Recovery is joint-specific. Your wrists and shoulders recover on a different timeline than your cardiovascular system, so a session that feels easy on your lungs can still be too soon for your hands. Give hard sessions 24 to 48 hours before repeating them, and treat these signals as stop signs:
- Wrist or knuckle soreness that lasts past the next morning
- Shoulder pain that shows up before you've thrown a punch
- Elbow tenderness on the inside or outside of the joint
Stress Relief, Mental Focus, and Hand-Eye Coordination
Stress reduction is one of the most underrated benefits of using heavy bags for conditioning. Striking a bag demands full attention, which crowds out the mental noise you walked in with. Most people finish a session calmer than they started.
How Long Should a Heavy Bag Workout Last?
A heavy bag workout should last 20 to 45 minutes for most people. Beginners do well with 15 to 20 minutes of rounds plus warm-up and cool-down. Experienced athletes often train 45 to 60 minutes, especially when mixing technique, power, and conditioning blocks.
| Goal | Session Length | Round Structure | Frequency |
|---|---|---|---|
| General fitness | 20-30 min | 3 min work / 1 min rest | 3x per week |
| Fat loss and stamina | 30-40 min | 2 min work / 30 sec rest | 4x per week |
| Fight conditioning | 45-60 min | 3-5 min rounds, sport-specific | 4-5x per week |
| Skill focus | 20-30 min | Slow rounds, technique first | 2-3x per week |
Heavy Bag Workout Routine for Beginners
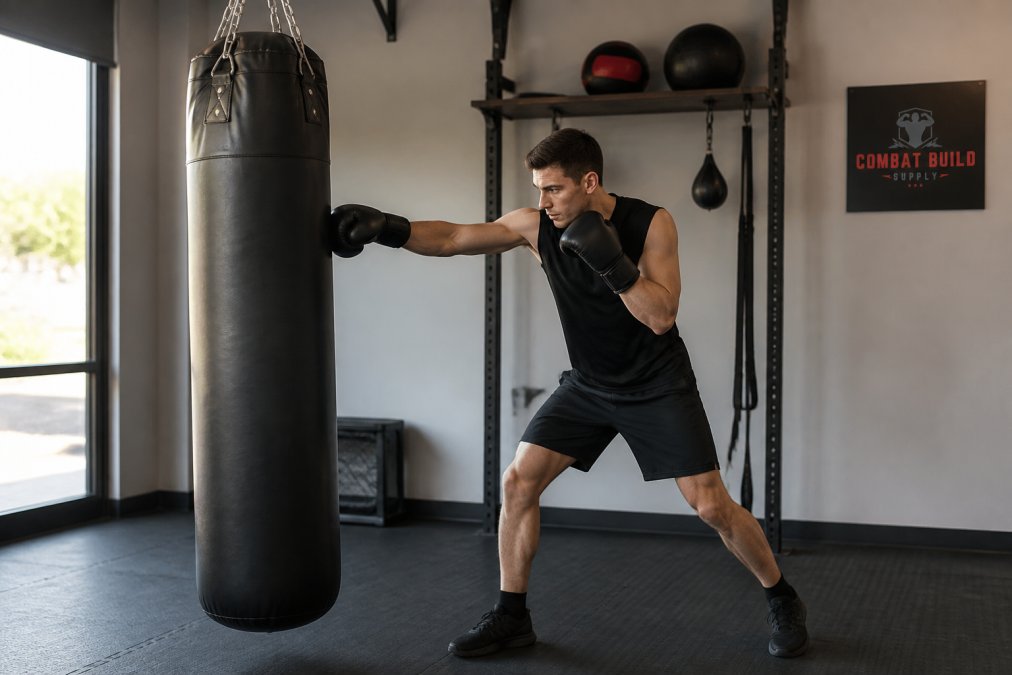
Most beginner routines hand you one workout and leave you guessing what to do next week. A progression framework fixes that. The plan below runs six weeks, adds one round per week, and holds intensity steady until your form survives a full round without breaking down.
The Six-Week Progression
| Week | Rounds | Work / Rest | Focus |
|---|---|---|---|
| 1 | 3 | 2 min / 1 min | Jab-cross only, 50% power |
| 2 | 4 | 2 min / 1 min | Add hooks, 60% power |
| 3 | 4 | 2 min / 45 sec | Add uppercuts, 65% power |
| 4 | 5 | 2 min / 45 sec | Add movement, 70% power |
| 5 | 5 | 3 min / 1 min | Full combinations, 75% power |
| 6 | 6 | 3 min / 1 min | Sport-specific combos, 80% power |
Two rules govern the whole plan. First, add one round per week, not one per session, most beginners get hurt by jumping volume too fast, not by training too little. Second, hold your current power percentage until your form holds through the final thirty seconds of the last round. If your wrist bends or your shoulders round off, drop back a week.
Sample Week 1 Session
Total Time: 25 minutes Difficulty: Beginner
What You'll Need:
- A heavy bag, mounted or on a stand
- Hand wraps
- Boxing gloves
- Water and a timer
Step 1: Warm-Up [Time: 5 minutes] Jump rope or shadowbox to raise your heart rate. Add arm circles and wrist rotations.
Expected Result: Clean, controlled strikes without wrist pain.
How to Know You're Ready to Advance
Three signals tell you it's time to move up a week: your last round looks the same as your first, your breathing settles within 60 seconds of the bell, and you finish without wrist or shoulder discomfort. If any of those fail, repeat the week. There is no penalty for staying put, the penalty is a wrist injury that costs you a month.
Choosing the Right Heavy Bag for Your Conditioning Goals
Equipment choice should follow your goal, not the other way around. A bag that is too light moves too much for power work; one that is too heavy can punish beginners who are still learning timing.
Common Mistakes and Recovery Protocols
Wrap your hands every session and warm up your wrists, shoulders, and hips before you throw anything. Those two habits prevent more injuries than any other change.
The mistakes that cause the most trouble:
- Punching with a bent wrist instead of a straight line from forearm to knuckles
- Skipping hand wraps because gloves feel like enough protection
- Throwing full power before technique is solid
- Training the same joints hard every day with no recovery
- Ignoring shoulder and rotator cuff warm-ups
Frequently Asked Questions
How often should I use a heavy bag for conditioning?
Three to four sessions per week works well for most people. Beginners should start with two sessions and build up. Your muscles and joints need 24 to 48 hours to recover between intense bag workouts. If you are sore or your punches lack snap, take an extra rest day. Consistency over months matters more than daily grinding.
Is heavy bag conditioning good for weight loss?
Yes. A 30-minute heavy bag session can burn 200 to 400 calories depending on your intensity and body weight. The interval nature of punching, moving, and recovering keeps your heart rate elevated and boosts fat oxidation. Pair bag work with a sensible diet and you will see steady progress. The caloric expenditure rivals running or cycling for the same time period.
What muscles does a heavy bag workout target?
Heavy bag training engages your shoulders, chest, back, core, hips, and legs. Every punch starts from the ground and travels through your kinetic chain. Your core stability transfers power from your legs to your fists. Shoulder endurance and wrist alignment improve as you practice proper punching technique. It is a full-body workout, not just an arm exercise.
Do I need a stand or can I hang a heavy bag from the ceiling?
Both work. A ceiling mount saves floor space but requires a joist that can handle 100 to 200 pounds of dynamic load. A heavy bag stand like the Heavy Duty 1 Bag Stand ($509.99) offers 360-degree access and adjustable height settings. It takes up little floor space and eliminates noise and vibration. Choose based on your ceiling height and training style.
Building a conditioning habit works best when your equipment holds up session after session. Combat Build Supply stocks durable bags, stands, and training gear designed for exactly that, with free shipping on every order, a 100 percent refund on defective or non-functioning items, and premium support by live chat, email, or phone if you need help matching a bag to your space. Get started with Combat Build Supply and train with gear that keeps every session on track.


